Initial Wizard

【For Administrator】
When you log in for the first time, a 3-step initial wizard will be displayed.
Follow the on-screen instructions to perform initial settings.
Step1 Register start time
What is the start time?
In the calendar, a day always starts from 0 o'clock. "Start time" is a setting on how to start a day in this system.
The case that is better to change the start time from 0 o'clock
Normally, an initial value is set at 0 o'clock.
If the last shift start time in your organization is after midnight, please refer to the following.
When the start time is set at 0 o'clock, the work day of the workers starts their shift from 23 o'clock and the one starts from 0 o'clock will be different.
For example, if the last shift start time is at 1 o'clock in the morning, the employee goes to work late at night on 1st of April.
When you go to work at 0:45 on 1st of April, your work record on that day will be recorded as April as it is already after midnight, and your salary will be paid in May.
[Start time set at 0:00]
The shift starts from 23:00 31st of March ⇒ The work record is on 31st of March
The shift starts from 0:45 1st of April ⇒ The work record is on 1st of April
However, if you want to treat this shift as the record of March, you need to change the start time of the system to later than the last shift start time such as 2 o'clock in this example. Then, because a day in the system starts from 2 o'clock every day, 0:45 on 1st of April will be assumed as 31st of March.
[Start time set at 2:00]
The shift starts from 23:00 31st of March ⇒ The work record is on 31st of March
The shift starts from 0:45 1st of April (the date according to a calendar)⇒ The work record is on 31st of March(the date in the System)
As mentioned above, attendance will be assumed as the record for 31st of March, and It will be paid in April.
You can not change the start time later. Please be careful when setting.
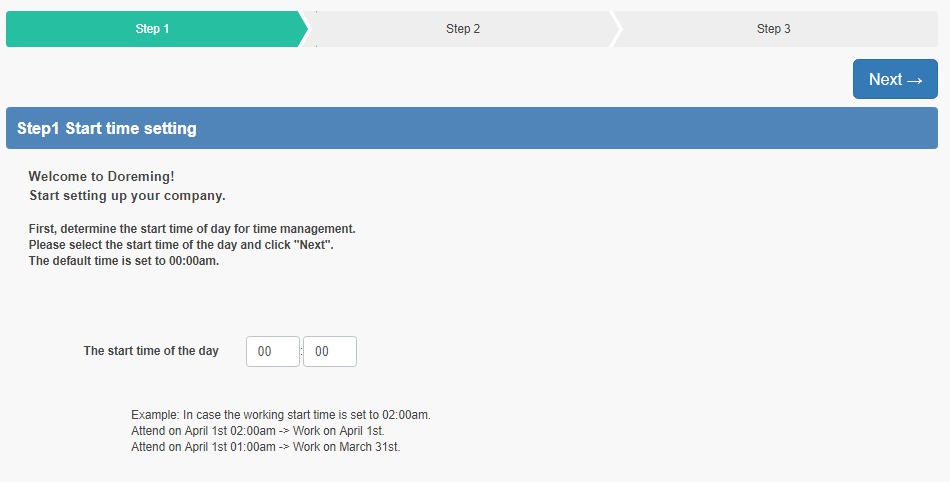
Click Next.
Step 2 Registration of working condition
Set pay frequency and payment date.
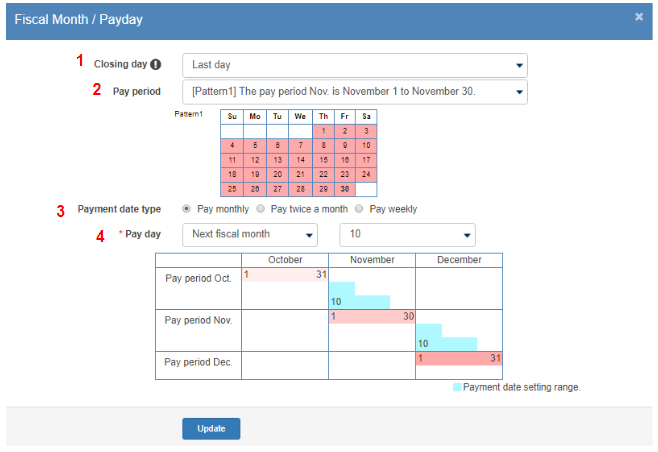
- Closing date :Select pay period
- monthly :You need to specify whether you are paying in the same month with a pay period or next month in this field, when you choose monthly for pay frequency and a pay day is other than ''the end of the month''.
For example, when you perform this setting in march, and you decide 20th of every month is a payday.
Pattern 1: March 21 to March 20
Pattern 2: From March 21 to April 20 - Number of payments:Pay frequency
・Monthly
・Twice a month
・Weekly - Payment date :Select payment date
・Monthly
Choose from either the current month or next month for payment. Only monthly payment can select the payment date as ''Current fiscal month''.
- ・Twice a month
Pay period of the month will be divided into two(not necessarily be 2 weeks) . You need to specify two closing dates and two payment dates.
・Weekly
Specify the start day of the week and the day of the week to pay.
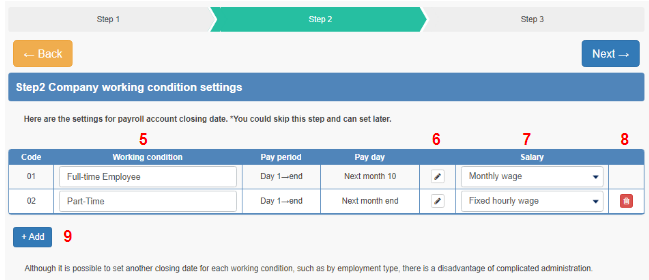
5.Working conditions:You can create own name for each working condition, such as Full time employee or Part time employee.
6.Pencil icon:You can edit the step 1 to 4 again by clicking this icon.
7.Salary:Select from Monthly wage · fixed hourly wage· time slot hourly wage · daily wage.
8.Bin icon:Click this to delete
9.+Add:Click this to register another working condition.
※This setting can be also registered from the working condition from the main menu even after start using the service.
Click Next.
Step 3 Staff registration
After registering employees, selecting working conditions, click [Completion] in the upper right corner of the page.
Registration is possible even after start using the service. First of all, we recommend to register more than one employee.
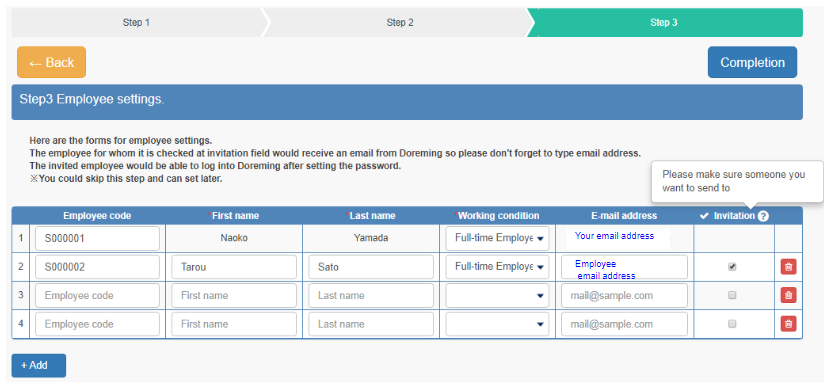
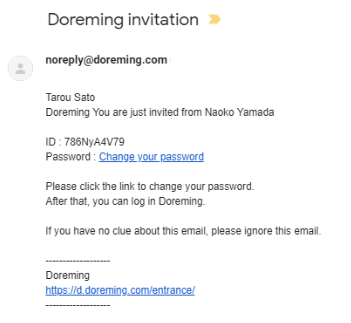
After entering the e-mail address of the employees, tick the box for the invitation letter, so that an invitation will be sent to your employees.
Employee will use the invitation email link to set the login password.
This completes the initial settings.