Create group hierarchy

【For administrators】
Here is a description of the group hierarchy.
You can manage groups by sorting them with a group hierarchy.
In the initial setting, the same group as the company name is registered, and the group created newly will be set below it.
Here, we will show you the procedure for setting the hierarchy when creating a new group and the procedure for setting the hierarchy of already existing group.
Set a hierarchy when creating a new group
As an example, the procedure to set the group "Sales division" under the Japan branch will be explained here.
- Click on Groups and Managers

.png)
- Click on the + icon.
.png)
- Enter the group name. * mark is a required item.
Click on + icon in the Path section..png)
- Select the group to be set to the higher level and click Create.
.png)
- Sales division was set under the Japan branch.
.png)
The procedure for setting a hierarchy when newly registering a group.
Set hierarchy of registered group
You can set the hierarchical setting of the registered group by dragging in the organization chart.
- Click on Groups and Managers.
.png)
.png)
- Click Organization chart.
.png)
- The organization chart is displayed.
.png)
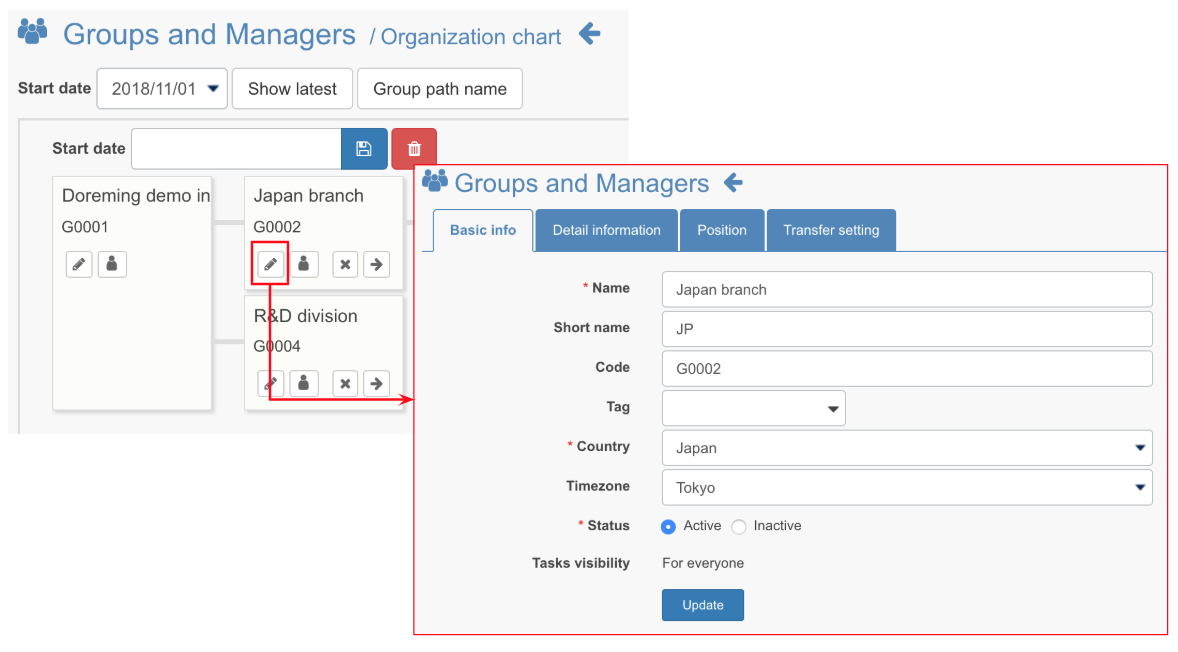
【About the icon in the group】- Pencil icon:Click to edit the basic information of the group.

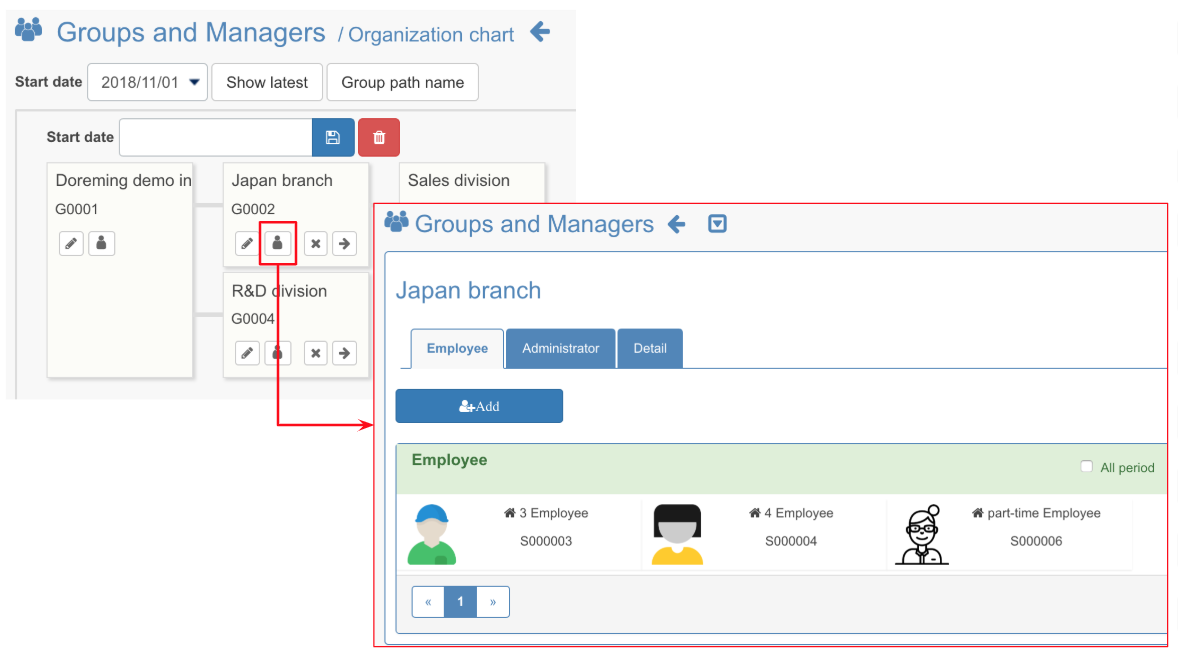
- Person icon:Click to add employee and add group administrator.
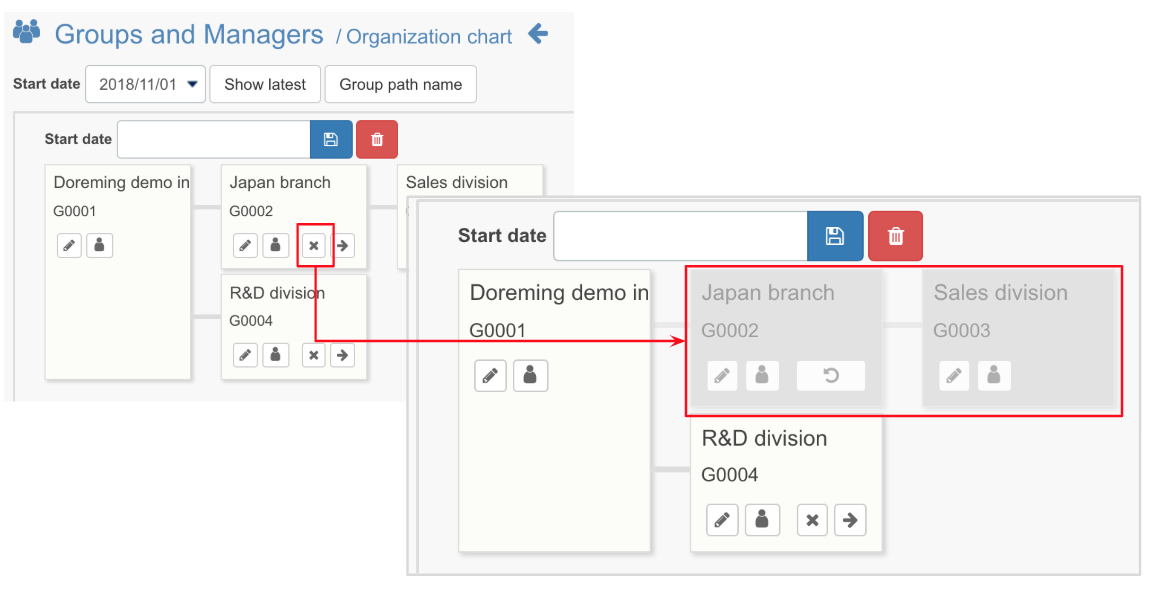
- ☓ icon:Click to deactivate the group. After the start date of application, invalidated groups will not be displayed. Please use it when organization changes or group no longer exists.
* Even if the group is invalidated, the employees who belongs to the group does not change. please transfer to the exciting group when you deactivate the group.
For the procedure, click here
- → icon:Click to move to the next lower level.
Please use it such as the president's office room and secretarial office which are independent and does not belong to any hierarchical structure.
- Pencil icon:Click to edit the basic information of the group.
- Drag the group you want to change the hierarchy and drop it on the group to be set to the higher level. It will be placed in the lower order.
In the figure below, for example, R&D division will be set under Japan branch.
- Set the Start date and click save icon.
.png)
The settings are reflected in the group list screen, and you can confirm that group R&D division is now Tree 03..png)
【About the icon in the group】
- Pencil icon:Click to edit the basic information of the group.
- Human icon:Click to add employee and add group administrator.

- ☓ icon:Click to deactivate the group. After the start date of application, invalidated groups will not be displayed. Please use it when organization changes or group no longer exists.
* Even if the group is invalidated, the employees who belongs to the group does not change. please transfer to the exciting group when you deactivate the group.For the procedure, click here
- → icon:Click to move to the next lower level.
Please use it such as the president's office room and secretarial office which are independent and does not belong to any hierarchical structure.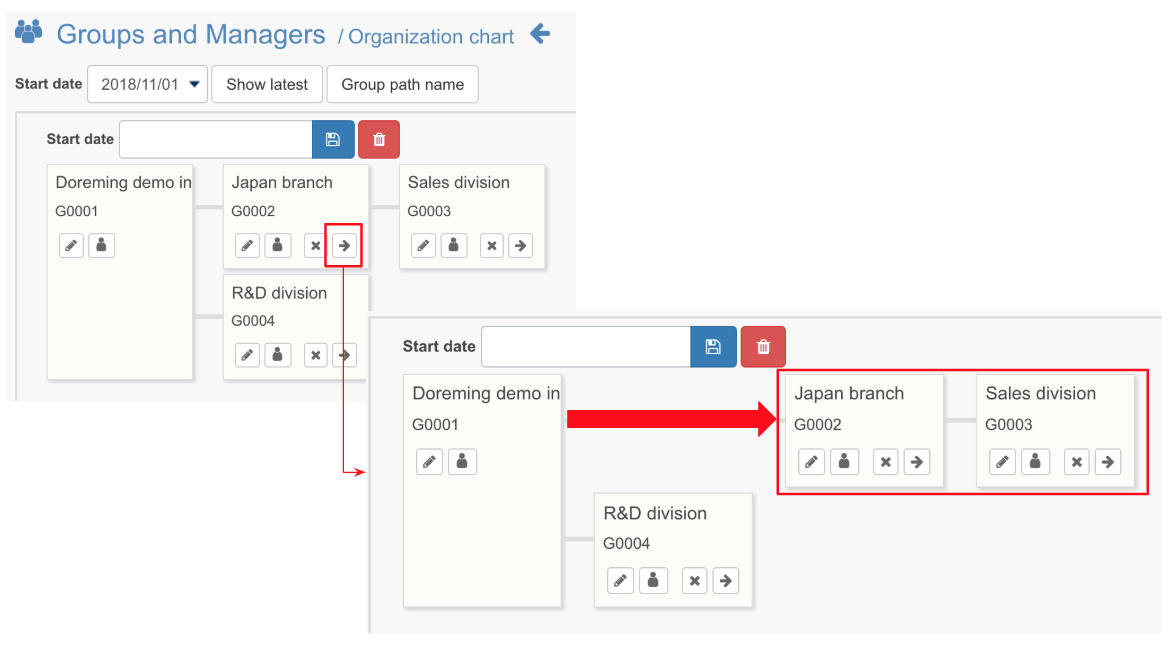
The hierarchy setting from the organization chart screen is over.
You can also set the hierarchy from the group list screen.
Below is a procedure for placing store A at the bottom of store B.
- Click on Groups and Managers.
.png)
.png)
- Switch to List menu and click on the hierarchical icon to go to the hierarchical management screen.
.png)
- Click on + Add.
.png)
- Set the Start date and the group (Japan branch in this example) to be set in the upper position and click Save.
.png)
* If you set the Start date, you can select the hierarchy that can be set at the application start date. - Return to the Tier management screen, and you can see R&D division is set under the Japan branch.
.png)
This is the procedure for creating a hierarchy.